

Cleaning Hacks: How To Make Your Grout Look New Again
At first, it was just a little discolouration. Then came the mould spots. Now your grout looks like they haven’t seen soap in years. The good news is, you don’t need to spend hours scrubbing or hire an expensive specialist. With a few tried and true cleaning hacks, and a bit of effort, you can lift years of grime and bring your grout back to life, making your tiles look as fresh as the day they were laid.
In this guide, you’ll discover simple, budget friendly methods to deep clean grout using ingredients you likely already have at home. Whether you’re dealing with bathroom tiles or preparing for a rental inspection, these tactics produce actual results. And, if you’re dealing with a professional provider, such as the reputable experts at budget Bond Cleaning Sunshine Coast, clean grout might be the key to passing the final inspection and receiving your full bond back. Getting your grout to seem fresh and flawless is easier than you would believe.
- Start With the Basics: Soap, Water, and a Stiff Brush
- Baking Soda and Vinegar: A Classic Combo That Works
- Try Steam Cleaning for a Chemical Free Solution
- Hydrogen Peroxide for Stubborn Stains
- Don’t Skip Sealing After Cleaning
- Preventative Care: Your Grout’s Best Friend
- Bonus Tip: Hire a Professional When Time Is Tight
- Wrapping Up
1. Start With the Basics: Soap, Water, and a Stiff Brush
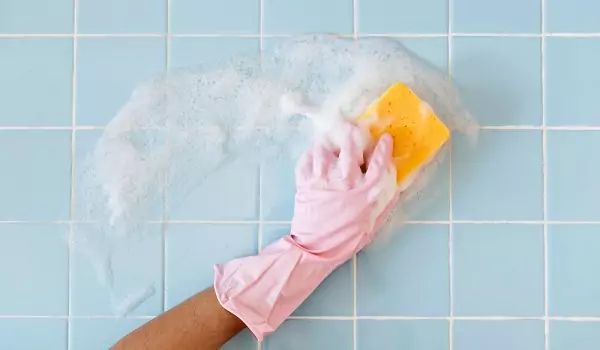
Before diving into those powerful home remedies or fancy tools, let’s keep it simple. Start by mixing some warm water with a splash of dish soap, then grab a firm bristled brush to scrub those grout lines. This technique is great for tackling surface dirt and can help you see just how much of that discolouration is really just grime instead of permanent stains. Remember to use circular motions and really work that cleaner into the grout. You might be amazed at how much dirt comes off with this straightforward approach!
2. Baking Soda and Vinegar: A Classic Combo That Works
If soap and water don’t do the trick, it’s time to bring in a DIY power couple: baking soda and white vinegar. Start by applying a paste of baking soda and water to the grout lines. Then spray white vinegar over the paste and let it fizz for a few minutes. This reaction helps break down embedded dirt and minor mildew. Scrub the area again with your brush, rinse with warm water, and wipe dry. You’ll likely notice a dramatic difference after just one round.
3. Try Steam Cleaning for a Chemical Free Solution
For those avoiding chemical cleaners, or just craving convenience, steam cleaning is a fantastic option. A handheld steam cleaner can blast away dirt, bacteria, and buildup in your grout using only high heat and water. This method is especially effective in bathrooms, where steam can penetrate deep into the grout without the need for scrubbing. In fact, many cleaning professionals, including those from expert Bond Cleaning Sunshine Coast, recommend steam cleaning as a safe and efficient way to restore grout without risking damage to the tiles. It’s also a good option if you’re preparing your home for inspection and want to impress without the use of harsh solutions.
4. Hydrogen Peroxide for Stubborn Stains
Sometimes, grout stains run deep. When that’s the case, hydrogen peroxide can be a more powerful yet safe solution. Mix it with baking soda to create a thick paste, apply it to the grout, and let it sit for 10 to 15 minutes. Scrub thoroughly, rinse, and admire your results. This method is particularly useful for older grout that hasn’t been cleaned in a while or for grout lines exposed to frequent moisture and soap scum.
5. Don’t Skip Sealing After Cleaning
Once you’ve put in the effort to clean your grout, don’t let it go to waste. Grout is porous and quickly absorbs dirt, spills, and moisture. Applying a grout sealer after cleaning creates a protective barrier that keeps your grout cleaner for longer. Sealants can be found at most home improvement stores and are easy to apply. Just brush or spray them onto clean grout, allow it to dry, and enjoy a longer lasting clean.
6. Preventative Care: Your Grout’s Best Friend
Prevention is always easier than restoration. Keep your grout clean with a few simple habits:
- Wipe down tiled surfaces after showers or spills.
- Use a mild cleaning spray weekly on tiled floors and walls.
- Dry areas where moisture builds up, especially in kitchens and bathrooms.
These steps can reduce the frequency of the subsequent deep cleaning sessions and help you keep your grout looking fresh every day.
7. Bonus Tip: Hire a Professional When Time Is Tight
Cleaning grout can be time consuming — especially if you’re on a deadline, like moving out of a rental property. In those cases, calling in a professional can be a smart investment. Many cleaning services include grout cleaning as part of their packages, and a thorough job can make a big difference in your final inspection.
That’s why people working with the professional Bond Cleaning Sunshine Coast team, often see better results and fewer disputes over bond returns. A spotless home, especially one with fresh looking grout, makes a strong impression on property managers.
Hacks to Make Your Grout Lines Look like New

Wrapping up
Grout might not be the first thing guests notice when they enter your home—but they’ll absolutely notice if it’s stained and grimy. Taking the time to clean and protect your grout goes a long way in making your whole space feel cleaner and more polished. Whether you’re gearing up for spring cleaning or preparing to vacate a rental, these hacks can help you transform dingy grout into something that looks practically new. Grout doesn’t have to be the weak link in your home’s cleanliness. With the right approach, it can shine just as brightly as the tiles it supports. Happy Cleaning!